Overclocking has traditionally been the domain of the strictly nerdy, but hardware manufacturers have made the basic process much simpler over the years. Overclocking can give your computer significant performance increases at the potential risk to the hardware itself. Striking a balance when working with overclocking settings is an art form more than a science, as every piece of hardware reacts differently.
Before You Start: Read This First!
I highly recommend you also look up some guides for your specific processor, and googling around for more information on subjects you don't understand or that we don't cover in depth. All that said, this guide should put the process into basic enough terms that those unfamiliar with overclocking can get a general feel of what it entails and how to get started overclocking their systems.
emember that no two systems will overclock the same—even if they have the exact same hardware. Every unit of every processor is different, and my i5-4690K may not overclock as highly as your i5-4690K, and vice versa, even with all other things held constant. So while it's useful to see what kinds of clocks other people are achieving, don't expect that you'll be able to do the same.
Glossary
While this is not an exhaustive list, these are the settings we'll be tweaking in this guide. The jargon related to your clock speed is as follows:
- The Base Clock affects your CPU frequency, RAM frequency, and other things. We won't be tweaking it in this guide, but we'll be using it to calculate our final clock speed.
- Coupled with the base clock, your CPU multiplier decides your final CPU frequency. It works like this: if your base clock is, say, 100 MHz and your multiplier is 35, your CPU frequency will be 100 MHz x 35 = 3.5 GHz.
- CPU Vcore is the main voltage value we'll be tweaking. As you increase your clock speed, you will likely have to raise your Vcore to supply your processor with enough power...

- What You'll Need
- A Windows machine. This guide is for Windows, though if you have a Hackintosh or a Linux machine with a Windows partition, that should do fine—we're just going to do our stability testing in Windows.
- An unlocked "K" series Intel processor. This guide was written with Intel's more recent processors in mind, particularly the "K" series processors designed for overclocking. They'll have a K in their model name (e.g. i7-4770K). This includes processors from Sandy Bridge, Ivy Bridge, and Haswell. If you have a first-gen Core i series processor, overclocking is a bit more complicated, but this guide should get you started. You can overclock other processors too (like Intel's low-powered Atom), but for this guide we'll be focusing on these. AMD users can probably follow many of the steps, but you may have to look up some additional information on your processor's settings first.
- An overclocking-friendly motherboard. Lots of motherboards should have overclocking settings built-in, but some motherboards have more settings than others, or are better suited for overclocking. If you're building a computer with the intent to overclock, you should read up on your motherboard's overclocking features before you buy.
- A good CPU cooler. If you plan on overclocking more than just a little, you'll want something other than the stock Intel heatsink and fan. A good air cooler will take you far, but for more extreme overclocking (and silence), you may want to look into water cooling if you have the time and money to put into it. Ask around, read at reviews on Newegg, and think about your overclocking goals to decide what kind of cooling you want.
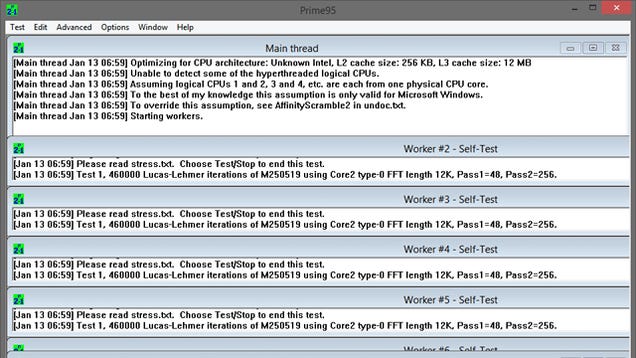
- Step 1: Run a baseline stress test. Before you begin overclocking, you'll want to run a stress test using your base settings. This will give you a baseline to compare against as you start overclocking, and will also show if there are any problems with the base in the settings that need to be addressed before overclocking makes them worse.
- Be sure to check your temperature levels during the stress test. If your temperatures are above 70 °C (158 °F), you will likely not be able to get much out of overclocking before your temperatures become unsafe. You may need to apply new thermal paste or install a new heatsink.
- If your system is crashing during the baseline stress test, then there is likely an issue with the hardware that needs to be sorted out before you begin overclocking. Check your memory to see if there are any errors
Step 2: Raise Your Multiplier
Now it's time to start overclocking. You can google around and see what kind of settings other people have gotten, but I still recommend starting at your base clock speed and gradually ramping up—it takes a little longer, but it's much easier to do and ensures you get the best stable overclock by the end of the process.So, boot back into your BIOS and head to its overclocking settings (they may be called "Overclocking Settings," or they may be called the "CPU Tweaker" or something like that).Find the setting called CPU Multiplier or CPU Ratio. Right now, it's probably set to "Auto". Highlight it and change it to one step above the default (either by pressing Enter or typing in a number, depending on your BIOS). If you aren't sure what your default is, it's usually listed at the top of that Overclocking Settings page. For example, my CPU comes stock with a multiplier of 34 for a 3.4 GHz clock speed, so I set mine to 35 for the first step.Once you've done that, reboot your computer back into Windows and head to the next step.- Step 3:Run a stress test again
- Reboot your computer and run your benchmarking program. If your computer doesn't encounter any errors after a few runs through the benchmark, you're good to raise the multiplier again. Repeat this process each time you increase the multiplier another increment.

Step 4: Keep an eye on your temperatures. Make sure you pay close attention to your temperature levels during this process. You may hit a temperature limit before your system becomes unstable. If this is the case, you may have reached the limits of your overclocking ability. At this point, you should find the best balance between increasing the base clock and increasing the multiplier.
- While every CPU has a different safe temperature range, the general rule of thumb is to not allow your CPU to reach the 85 °C (185 °F) level
Step 5: Rinse and Repeat
Repeat this process (steps two through four, as governed in step three) until you reach your maximum safe temperature or your maximum safe voltage (again, Google your specific CPU for more information). When you reach this point, back your settings down to the last safe and stable value. I got my multiplier up to about 43 before my temperatures reached my upper limit, so 4.3 GHz was my final overclock.
Next Steps
Like we said, this is a very basic introduction to overclocking for beginners. Beyond this, there's a lot more you can do. If you're happy with your overclock, then good! You don't really need to go further, However, here are a few things we'd recommend checking out if you want to dig a little deeper:
- Enable power-saving features: Once you've overclocked, your processor will likely stay at that speed all the time, constantly drawing extra power (and producing extra heat). Luckily, your motherboard probably has some built-in power-saving features, like Intel's C-states or Speedstep. Once you're done overclocking, you can re-enable these, which will cause your CPU to "drop down" to slower speeds and smaller voltages when it's idle. However: you may need to play around with the settings on your individual motherboard. For example, on my MSI motherboard, I had to use the per-core overclocking setting in "CPU Features" in order for this to work (see below)—just setting the multiplier in the main settings wouldn't let me re-enable C-States. Other motherboards may require you to use something called "Adaptive Mode" for your voltages. Do some research on your specific board if you want to re-enable these power saving settings.
- Clock your RAM: When you first build your computer, your RAM doesn't default to running at its rated speed. In fact, it's probably running at a slower speed than designed. If you want it to run faster (which doesn't make a difference in most applications, but can in virtual machines or some more recent games), you can set your RAM speed and voltage in the BIOS according to its specs. You may want to run a Prime95 Blend test (instead of Small FFT) afterwards to ensure it's stable, or try a few runs of Memtest86.
- Enable per-core overclocking: most modern CPUs also allow for per-core overclocking, allowing you to get even higher clocks when your computer is only using one or two cores. This guide is a pretty good introduction to the subject.
- Lots, lots more: There are a ton of experiments you can try if you really want to push your CPU to the limit, but we won't cover them here. If you want to take it even further, search around for more advanced guides on the web and you'll find a lot to get you started beyond the basics.
There's plenty more to overclocking, but this guide should be enough to keep any beginner busy for awhile. Remember to do some outside reading; the sites mentioned at the beginning of this article have a ton of information contained within. The more you read, the easier the process is going to be (and the more effective your overclocking will be). Good luck Techstellerians!!!
Curtsy of Linehackers
No comments:
Post a Comment